I just recently (by the skin of my teeth) completed my painting vow for the Bolter and Chainsword painting challenge. Here are my Grey Hunters!


I’m very pleased with how they turned out! let me know what you think!
Outgunned, outnumbered, though never outclassed.
I just recently (by the skin of my teeth) completed my painting vow for the Bolter and Chainsword painting challenge. Here are my Grey Hunters!
I’m very pleased with how they turned out! let me know what you think!
In honor of the new, and rather delish Tomb Kings release last weekend, I wanted to post up a ‘how to’ article on painting up your undead forces in double quick time in readiness for battle.
As you may have seen in the current issue of White Dwarf, they give you some ideas for different techniques for painting your skeleton warriors. They look great, but are rather in-depth, probably too much so for those of you, like me, who are not only a full time computer masher during the day, but also a full time dad and part time rock star. My point being, you don’t have too much free time to paint.
Part the first:
Once your skellywags have been assembled (arguably the most time consuming part of this) you’re going to want to spray undercoat the little buggers. I’ve used Duplicolor Sandable Primer, matt white, which costs about $6 from any auto store, and is far superior to the expensive shite that Games Workshop tout as spray paint. I leave them overnight to dry, although they are dry to the touch in a few minutes, but I’m usually doing something else, yay for multitasking.
You should be looking at a nice, white skellie, yes? Good, then we can move onto…
Part the second:
Get a pot of Devlan Mud*, insert your wash brush, or other larger brush, then liberally slap it on all over the mini. I tend to do a second coat on things like the face and ribs, as they have the most detail. Try not to pool it if possible. Set aside to dry. I have been working on a unit of horse archers, as you can see. The GW washes dry, so by the time I have washed one, moved on to the second, the first is already dry. You’ll already start to see things taking shape, thus:

Some of you out there may choose to stop at this stage, which is fine, but they still need to pop a little bit, IMO. This leads us nicely into…
Part the third:
This is where your little creepers will come to (un)life. Get your brush that you use for drybrushing, open your Bleached Bone paint and drybrush them. This will give that extra dimension to them (whoah! 3-D!). It’ll pick out the ribs and facial features a little more, plus give them a little more ‘dry’ and sun bleached feel. You could even add another drybrush step here with Skull White, which I did, as I do it on just the face and ribs, very lightly:

The bone parts are done! Simple, eh?
Part the fourth – details:
You’ll still need to paint your quivers, bows and other bits after this, but again I keep it simple. For the bows I use a Mechrite red base, washed with Devlan Mud. The quivers with Hawk Turquoise washed with Devlan Mud (this is to give the overall feel of wear and dirt over a couple of centuries). The quiver flap and straps are base coated in Chaos Black, and a quick line highlight of Greatcoat Grey (PP3) and then Codex Grey . DONE! You can add details like hieroglyphs and what not, but the aim of this is to be quick, right?
Part the fifth – finishing touches:
Base ‘em! I use a pumice filler for the bases, as it looks like that dry, parched desert ground. Once it’s applied then dried, it’s basecoated with Snakebite Leather, then drybrushed with Bleached Bone, then a little bit of Skull White. Add a couple of tufts of desert flock and you should have a nice looking painted unit, ready to deal some serious arrow violence on your enemy:


Following this should get you your mass troops done in next to no time, allowing you to spend a bit more time on your character figures.
Let me know how you get on – good luck!
*I just bought a new pot of Devlan Mud the other day, as my other pot had run out. To my dismay, I find that it’s a slightly different shade, and almost looks like it’s got either Ogryn Flesh or Gryphonne Sepia in it. Bollocks!
Rob over at Warhammer 39,999 had a great idea for resurrecting old blog posts that may have been missed by newer readers, or just forgotten about in the annals of internet time.
I guess When Cannons Fade is still in it’s infancy when you look at some of the other big players out there, but thats ok. I’ve never really been one to post up army lists, dissect rules, or start working on the math behind my beloved hobby (I leave all that complicated stuff to Dethtron 🙂 ).
I do however, enjoy focusing more on the hobby side of the game, the painting, converting, WIP side of it, so thats what this contribution to Old Stuff Day will be, a look back on my boys in black, my Templars.
This post from back in February 2009 showcased my efforts for the founding of my Templar chapter. I had acquired the Assault on Black Reach box set, and given the Orkses away to my buddy Evan. I thought that this would be a great way to start an army, or at least bulk up the plastics I had already been amassing.
First to be tackled was the Dreadnought. The snap-fit style of the set was good, although I think they used a harder type of plastic, because cutting and trimming it was a bitch! Eventually, after some blood, sweat and tears were expended the honored brother, in all his resplendent glory, was finished:

Don’t forget to check out the original post for more views: http://whencannonsfade.com/2009/02/27/completed-the-aobr-dready/
Fast forward to August of 2009. After tinkering around with some other bits and pieces, I did a test run on how I would be painting my boys in black. I was very happy with the results:
Before

After

You can see the post and pictures in it’s entirety here: http://whencannonsfade.com/2009/08/27/chaos-lord-wip-and-black-templar/
November 2009 sees the appearance of my Black Templar Assault Marines. Exactly as the label says:

So there we have it, a couple of snap shots from WCF’s past. Since then I feel that I have improved on my painting skills (i’m pretty pleased with my Templar Rhino with xtra armor, and my Landspeeder). There will be more Templar goodness to come, but I do hope you’ll swing by the WCF TARDIS and have a look back through the archives!

Cheers!
Paul
Brief musical interlude, brought to you by Crusader. Vocals by yours truly, drums by Dethtron of Dick Move. ENJOY!
Cheers!
‘Come my brothers, come walk with me
to the new worlds across the Great Sea
In Asaheim our destinies lie
as warriors at The Emperors side…’
I decided to take a step out of my current projects and do something completely different. I have some odds and sods that I picked up off Ebay, like Deamonettes, Chaos Warriors and whatnot, just odd minis, not whole units, so I could change things up once in a while. I Also thought it would be a good way to push myself in terms of techniques and strive to get me up to a higher standard. So, reaching into my drawers (hehe) I pulled out this chap and set to work.
I’ve always had a bit of a soft spot for Space Wolves, being a frustrated viking myself, so I was pretty intrigued as to how he was going to turn out. I debated at first whether or not to go with dark grey armor, or the lighter ice blue/grey armor. I settled on the latter, as so much of my other stuff is supergrimdark so the change of pace was quite satisfying.
I spent 10 hours (roughly) on this chap, but I’m very pleased with the results. I have to pick up some of this adhesive stuff to apply the decal to the shoulder pad. I’d forgotten how much I hated water slide decals, especially for shoulder pads. Trying to apply a flat surface to a rounded one will ineveitably lead to frustrating creases. I remember Dethtron telling me about this stuff you paint over the decal which basically fuses the membrane to the surface of the mini.
This was the recipe I used for my Space Wolf:
Armor:
Basecoat with a 1:2:1 mix of Space Wolf Grey, Shadow Grey and Codex Grey. Wash with Devlan Mud in the armor recesses. Don’t worry about being tidy! The add progressivley more Space Wolf Grey to the base mix and paint the armor plates, concentrating more on the outer edges to get that defined edging.
Bones:
Base coat of snakebite leather. Devlan mud wash over the basecoat. Re-apply snakebite leather on the higher parts to begin your highlights. Add bleached bone to this for your highlights. Take this all the way up to bleached bone, or even skull white, depending on how ‘bright’ you want it.
Yellow areas:
Base coat of Tausept Ochre, add some skull white to this and paint a layer on. Wash with devlan mud and gryphonne sepia (concentrate more on the edges). Add skull white for highlights.
Eagle/helm trim:
Base coat is a 1:1 mix of shining gold and scorched brown. Wash with devlan mud. Add layer of shining gold on the high points. Add mithril silver to this for highlights.
Jewels:
Scab red base coat, followed by blood red, add vomit brown to the blood red for highlights finished with a dot of skull white.
Shoulder pad rims:
Base coat of Bolt Gun Metal, washed with devlan mud. Mithril silver to give worn look to the very edges.


As always, comments and criticisms are always welcomed!
When Cannons Fade is rapidly approaching its 2nd birthday (seriously, where has the time gone?) and there may be a few changes going on around here. I’ll reveal more on or around November 7th, along with some self indulgent ‘looking back’ at WCF since it’s inception.
Cheers!
Paul
I know I know, its a hobby blog related with wargaming. Well, it’s my blog, and this warrants an entry. Or maybe requires a warrant for entry.
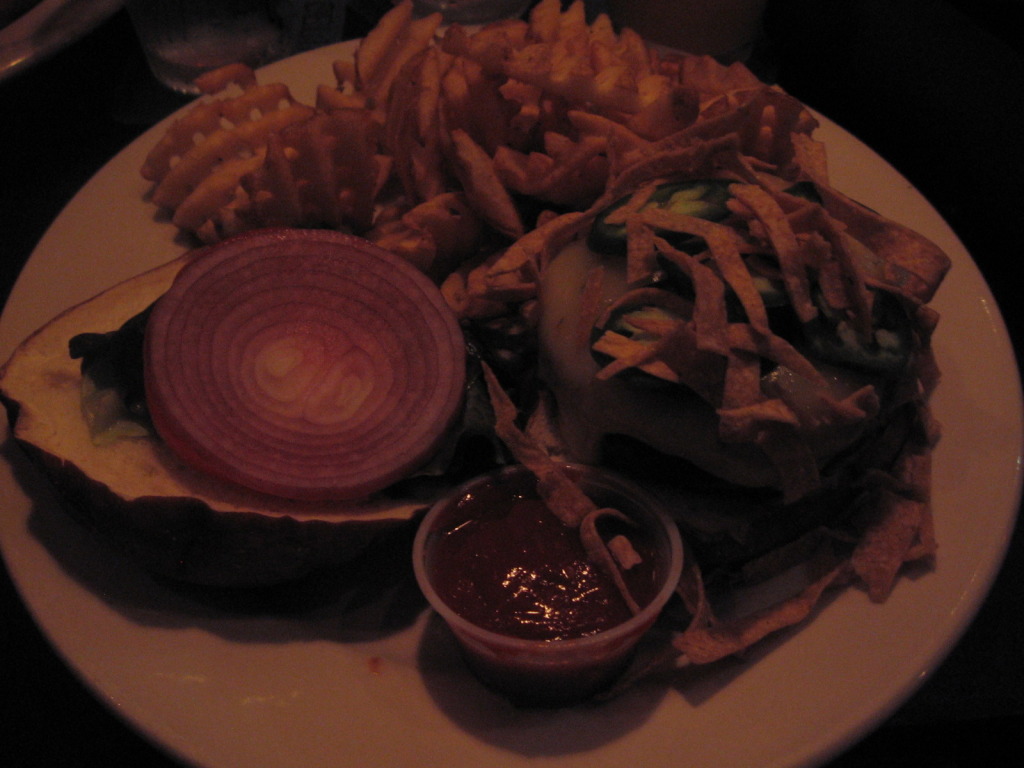
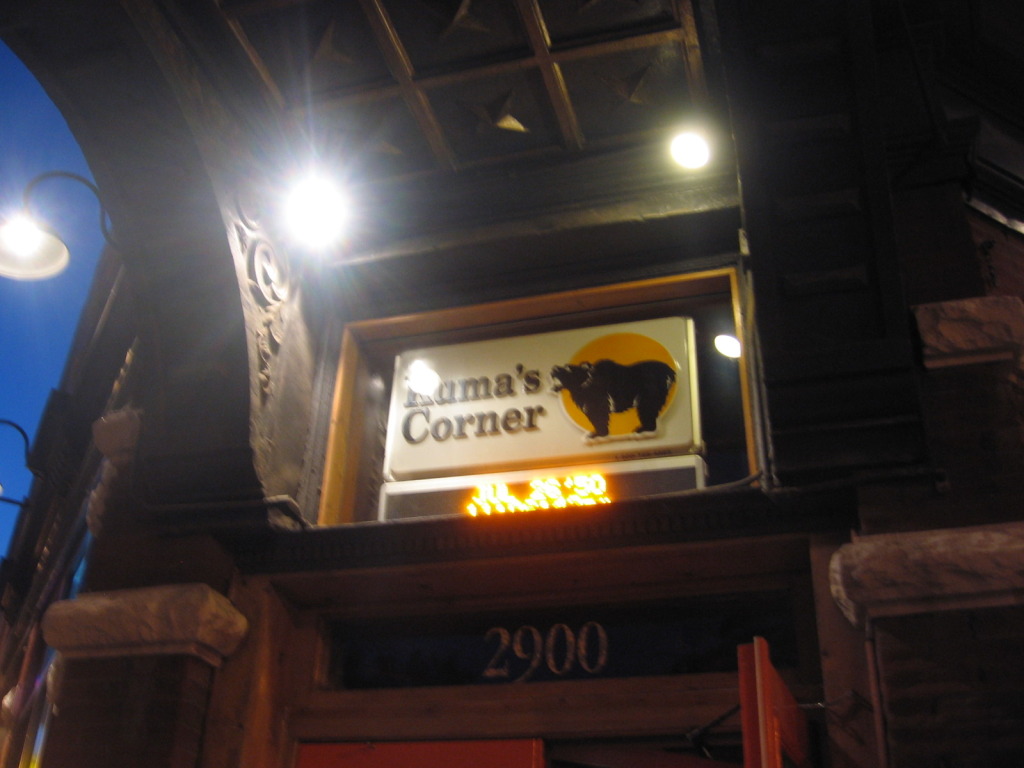
Anyone who lives in, or visited Chicago should (if you don’t already) know about Kuma’s Corner. A burger joint thats about the size of a shoebox with loud and very heavy music playing. The place has been in in the national press numerous times, and also on local TV networks. It’s famous for having incredible hamburgers all with names of heavy metal bands.
I went there with the Boss Lady and some friends on Saturday night. The place is also renowned for its waiting times to get seated, and we waited an hour and a half(ish) before we sat at our table. Who cares? its KUMAS! The food is totally worth the wait. I ordered myself the ‘Plaguebringer’ while the Boss Lady ordered the ‘Iron Maiden’. Food = good, beer = great. Good times had by all.


So, if you’re in Chicago, do yourself a favor, and go to Kuma’s, order a burger served up with a side of heavy metal.
When Cannons Fade approved!
So, I have pledged that the month of December (starting in true, Khadoran, snowy fashion) shall yield me completing two minis. The first being my Eiryss, Mage Hunter of Ios and my Destroyer Warjack. The destroyer won’t be in the usual Khador red, I opted for green on this guy. There will be some hits of red, but I really, and I mean really hate painting red. I figured a WW2 style green armour would look cool. I can see it having plenty of weathering and some rust patches, and will even be putting some snow on him too. I figured I would change the schemes up for different units/jacks in my Khador army. One of the things that bothers me about Warmachine is that each faction has its color. Its like a bloody football team or something.
Eiryss will be dropping the green cloak in favor of a snowy white cloak, to keep in theme with the northlands, with a green surcoat and a pale ice blue on the inside of her cloak. She’ll probably have brown leather boots, and will be complemented by a snow covered base. I want to convey her ‘invisibilty’ attribute by having her well camoflaged, only distinguishing the gear she is wearing underneath her cloak. I also own the alternate sculpt that was available through No Quarter magazine, and in my opinion is a far superior sculpt to the one i’ll be painting. The original, while dynamic, looks a little odd on the battlefield with the ‘movement’ of the figure, exaggerated by the positioning of the cloak. Does she only run backward? or is the wind always blowing from behind her? Sometimes I think Privateer Press should think less about crazy dynamic posing, and more about pose durability with their figures. Still, if this plastic rumor is to be believed, then we’ll see a world of difference…
I’ll start posting photo’s of the progression soon!!

